Frequently Asked Questions
How does one display navX data on the FIRST FRC robotics dashboard?
The Data Monitor example code demonstrates how to perform navX-MXP initialization and display all sensor values on a FIRST FRC robotics dashboard. The output data values include:
Full Java Source code on GitHub
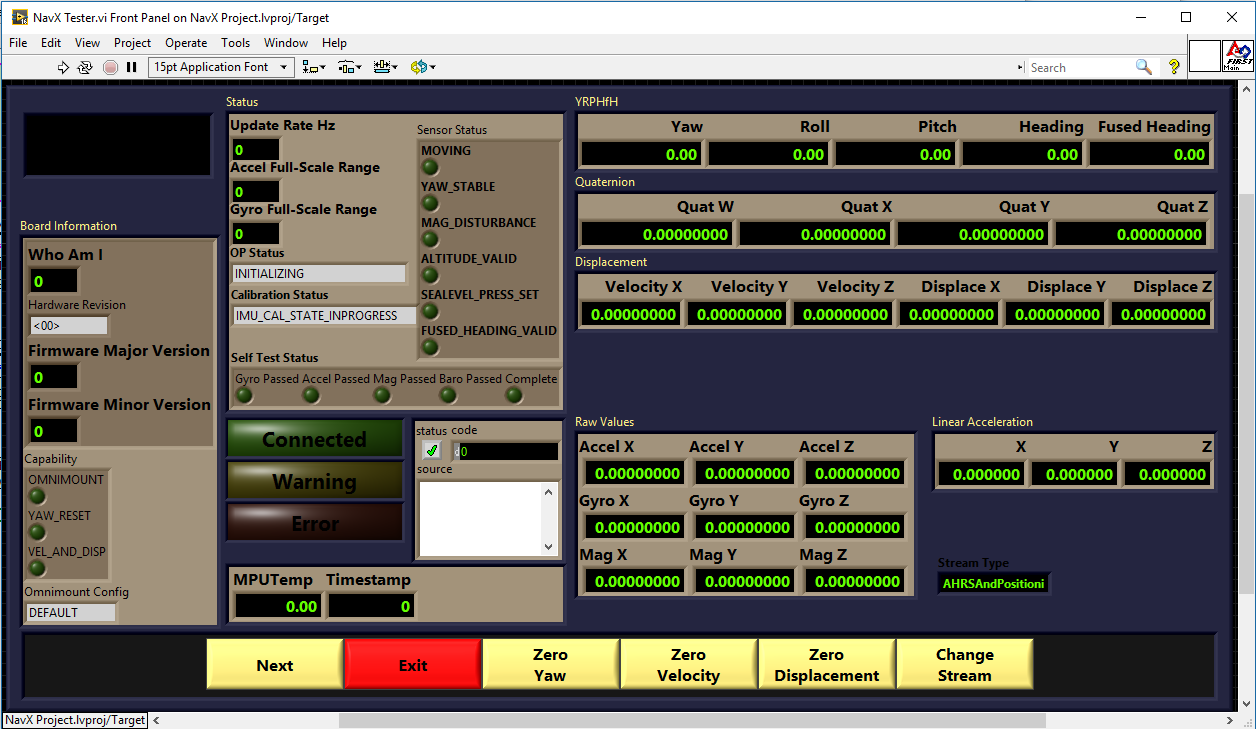
- Yaw, Pitch and Roll angles
- Compass Heading and 9-Axis Fused Heading (requires Magnetometer calibration)
- Linear Acceleration Data
- Motion Indicators
- Estimated Velocity and Displacement
- Quaternion Data
- Raw Gyro, Accelerometer and Magnetometer Data
FRC C++ Example
Full C++ source code on GitHubFRC Java Example
Full Java Source code on GitHub
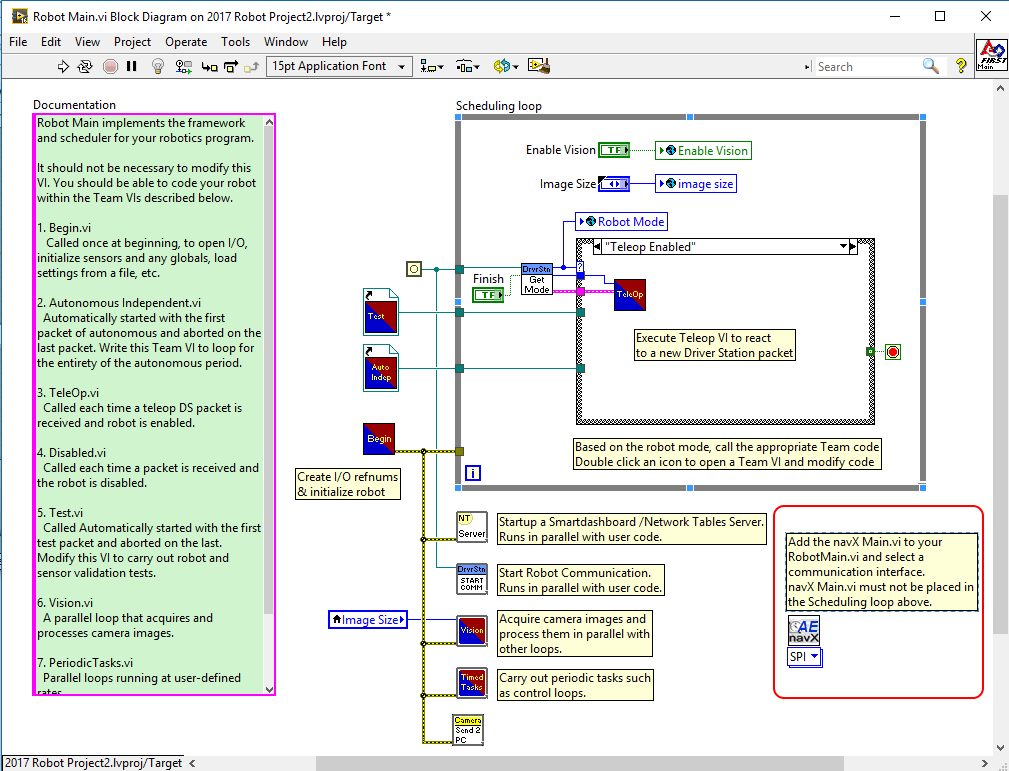
FRC LabVIEW Example
The navX-MXP Test_Window.vi example shows all of the outputs from the navX through “FRC RoboRIO Robot Project”.RobotMain.vi
Place the NavX main vi on the block diagram and set it up to your needs. The default sample rate is 50Hz. You may need to process faster for your situation. For the SPI, I2C and USB connections the max sample rate is 200Hz.Test Window.vi
Place the Test Window.vi inside of a loop in any VI (for instance in your Teleop.vi loop) and the values will automatically update. Test Window.vi is in the navX-AE “Get” folder. Last Updated 9 years ago