Frequently Asked Questions
How does one implement collision detection using the navX-Sensor technology?
Collision Detection is commonly used in automobiles to trigger airbag deployment, which can reduce the force of an impact and save lives during an accident. A similar technique can be used on a robot to detect when it has collided with another object.
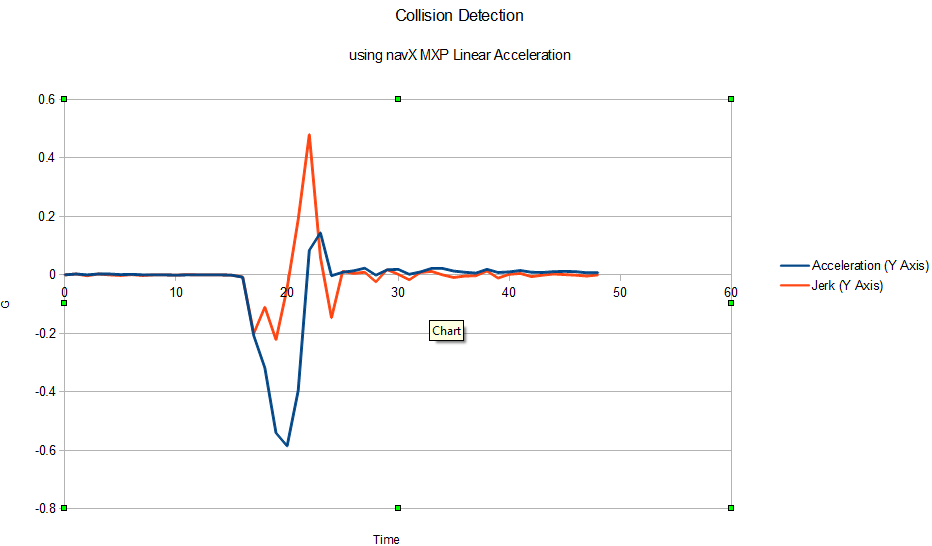
The principle used within the Collision Detection example is the calculation of Jerk (which is defined as the change in acceleration). As shown in the graph below (taken from navX-MXP data recorded in LabVIEW of a small collision), whenever the jerk (in units of G) exceeds a threshold, a collision has occurred.
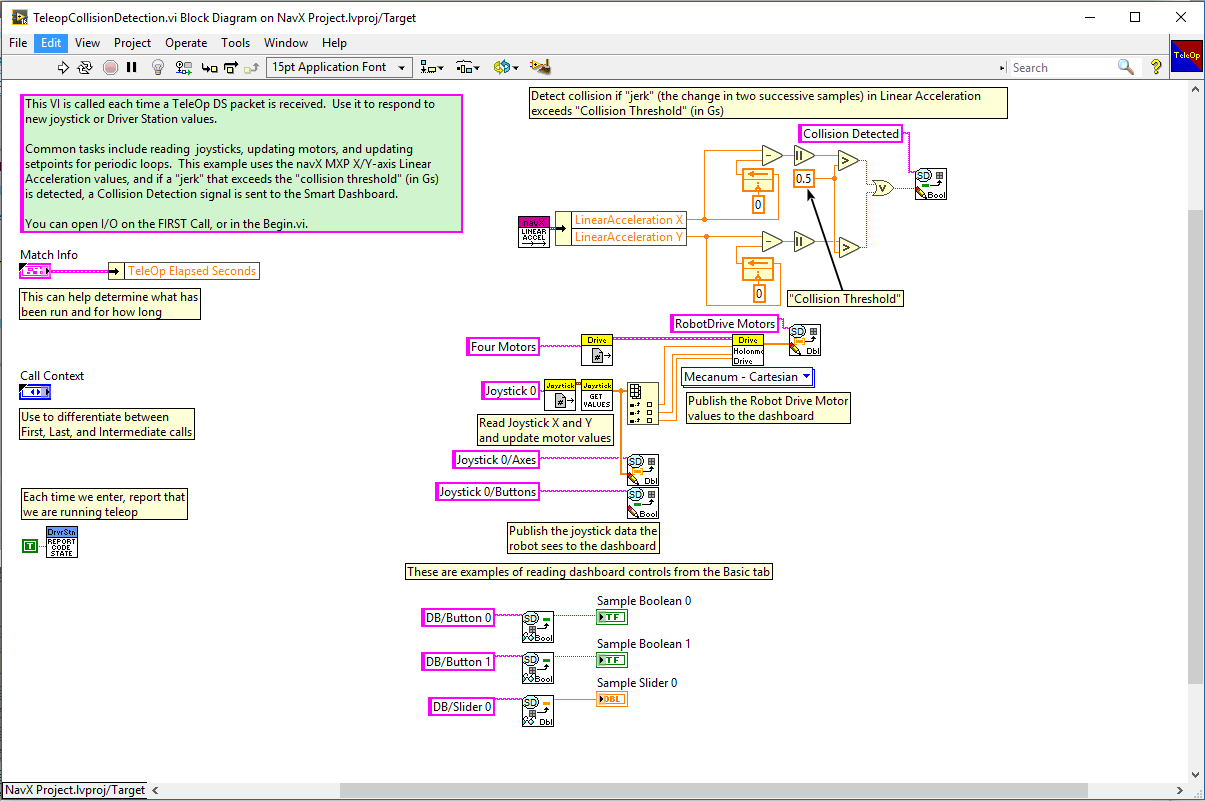
In the sample code shown below, both the X axis and the Y axis jerk are calculated, and if either exceeds a threshold, then a collision has occurred.
The “collision threshold” used in these samples will likely need to be tuned for your robot, since the amount of jerk which constitutes a collision will be dependent upon the robot mass and expected maximum velocity of either the robot, or any object which may strike the robot.
Full Java Source Code
Full LabVIEW Source code on Github
The principle used within the Collision Detection example is the calculation of Jerk (which is defined as the change in acceleration). As shown in the graph below (taken from navX-MXP data recorded in LabVIEW of a small collision), whenever the jerk (in units of G) exceeds a threshold, a collision has occurred.
In the sample code shown below, both the X axis and the Y axis jerk are calculated, and if either exceeds a threshold, then a collision has occurred.
The “collision threshold” used in these samples will likely need to be tuned for your robot, since the amount of jerk which constitutes a collision will be dependent upon the robot mass and expected maximum velocity of either the robot, or any object which may strike the robot.
FRC C++ Example
Full C++ Source CodeFRC Java Example
Full Java Source Code
FRC LabView Example
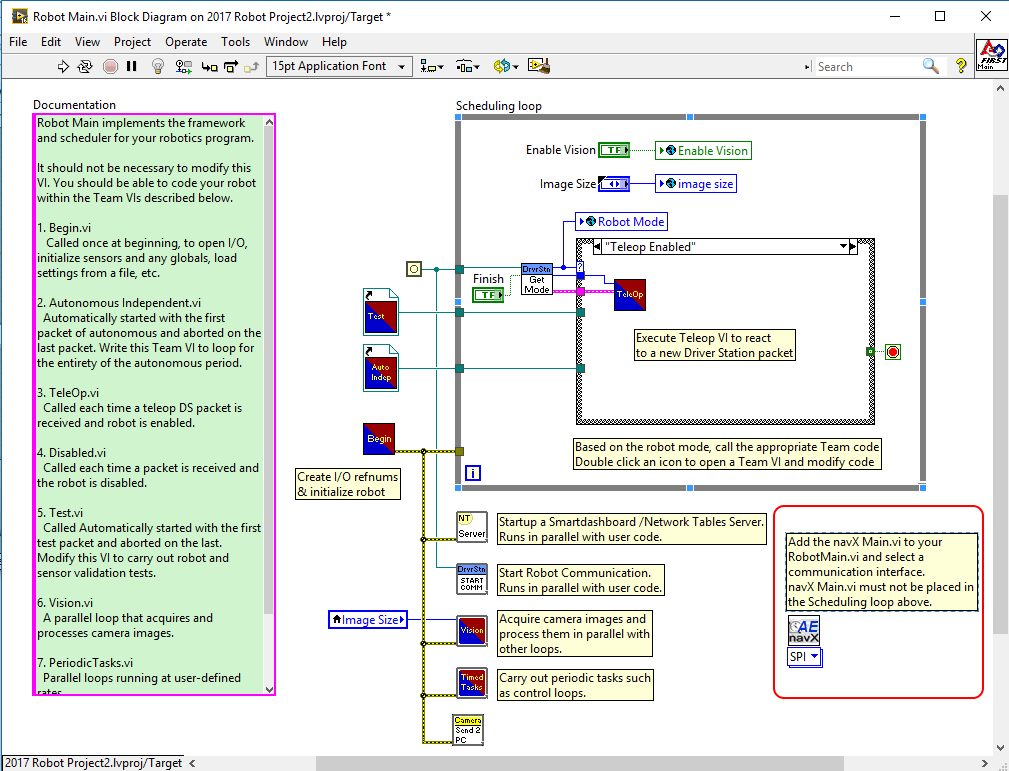
The navX-MXP AutoBalance LabView example shows how to make small modifications to the LabView “FRC RoboRIO Robot Project” using the “Mecanum Robot” configuration to implement collision detection.RobotMain.vi
Place the NavX main vi on the block diagram and set it up to your needs. The default sample rate is 50Hz. You may need to process faster for your situation. For the SPI, I2C and USB connections the max sample rate is 200Hz.Teleop.vi
The Teleop.vi is modified to feed the Linear Acceleration to a threshold detector to determine if a collision has occured.Full LabVIEW Source code on Github
Last Updated 9 years ago