Frequently Asked Questions
How does one use the magnetometer calibration tool?
Magnetometer Calibration Tool
The navXMagCalibrator tool is used to calibrate the navX-MXP magnetometer.Installing the navXMagCalibrator
- Download the latest build.
- Unpack the contents of the navx-mxp.zip file and run the setup.exe program, which will install the navXUI, as well as all necessary device drivers for communicating over USB with the navX-MXP, as well as some additional tools.
- Connect the USB cable between the navX-MXP circuit board and your Windows computer.
Running the navXMagCalibrator
Start the navXMagCalibrator
From your windows start menu, first select “Kauai Labs” and then “navX-MXP” and click on the navXMagCalibrator item.
Connecting to navX-MXP
Once the navXMagCalibrator application is started, select the COM Port on which your navX-MXP is connected, and press the “Open” button. If navX-MXP is successfully opened, you will see information about the navX-MXP circuit board: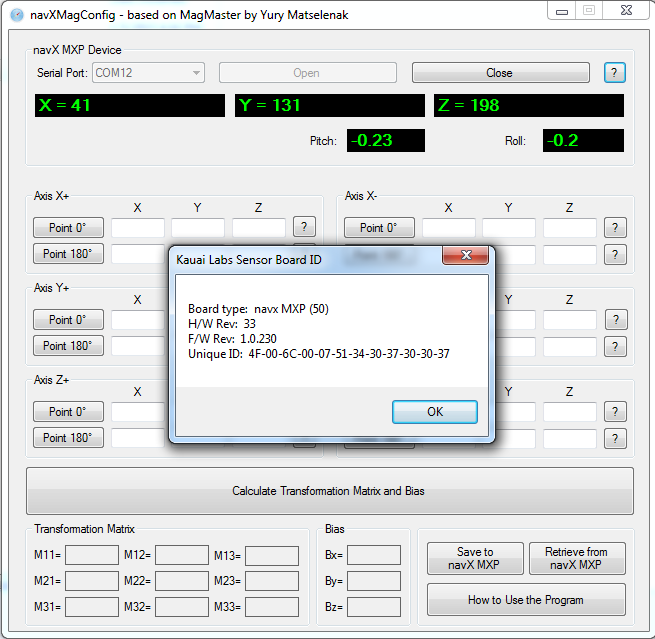
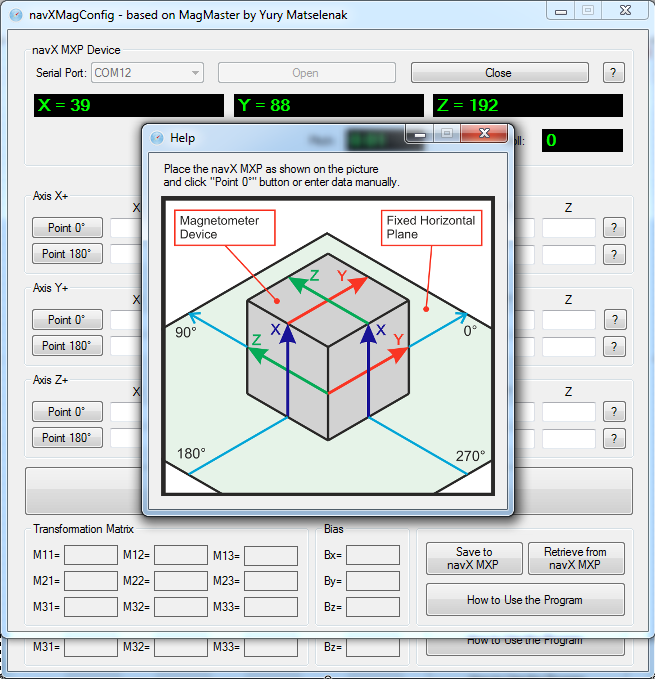
You will need to take 12 separate data points. Starting with the “X+” axis, click on the help button (labeled ‘?’) to the right of the X+ controls. This will bring up an Axis orientation dialog. Carefully align the navX-MXP such that it’s X, Y an Z axes (see silkscreen on the navX-MXP circuit board) are in the orientation shown in the dialog, relative to reference coordinates – for instance the edge of a square table.
Once you have aligned the device for this first reading, press the “Point 0 degrees” button to store the current magnetometer readings corresponding to this orientation.
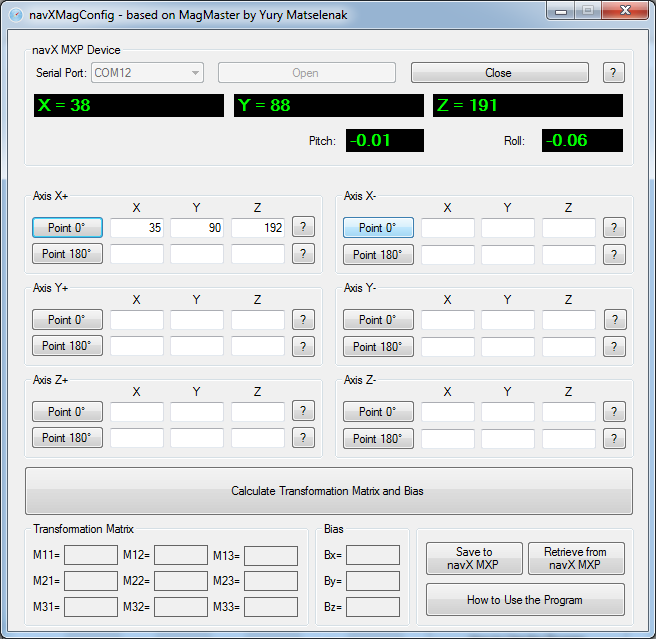
Repeat this process for all data points, until all 12 sets of data points have been collected.

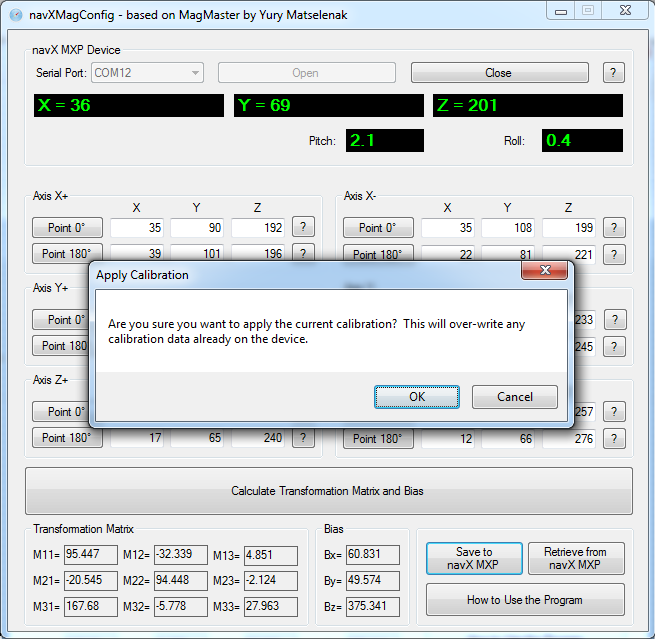
Next, press the “Calculate Transformation Matrix and Bias” button. You will see the results of this displayed in the “Transform Matrix” and “Bias” controls section on the bottom left of the navXMagCalibrator window.
If the data points you have taken are invalid, you may receive a message indicating there are invalid data points. In this case, restart taking the data points, repeat the process above until you have a valid set of data points.

Once a set of valid data points has been acquired, press the “Save to NavX-MXP” button to store the calibration data to the navX-MXP circuit board. This calibration data is stored to navX-MXP’s onboard flash memory, so this calibration data will be saved for future use.
Once the data has been saved to navX-MXP, the navX-MXP circuit board will immediately begin using the calibration data. At this point, the “compass heading”, the “9-axis heading” and the “magnetic disturbance detection” features will begin working. These capabilities can be demonstrated via thenavXUI.
Last Updated 9 years ago