Frequently Asked Questions
How does one use the navX-MXP C++ library?
C++
Update [1/7/2017]: The navX-MXP LabVIEW library for FRC has been updated to support the 2017 WPI Library.
To use the library, you can download the latest build of the libraries; advanced users can checkout the source code with Git. To learn more about the library, online help is available. If developing in a Linux or MacOS platform, you can download the cross-platform library package.
Getting Started
Before getting started, ensure you have installed Eclipse and the latest WPI Library Plugins.Several sample C++ Robot Applications are provided. After running the setup program included in the latest build, the libraries and samples will be installed to the following location:
\navx-mxp\ (e.g., if your user name is Robot, the directory name will be C:\Users\Robot\navx-mxpWithin this directory, the “cpp\examples” directory contains several example programs. Select the example you wish to start with and import the sample project into the Eclipse IDE.
Configuring Eclipse Project Settings
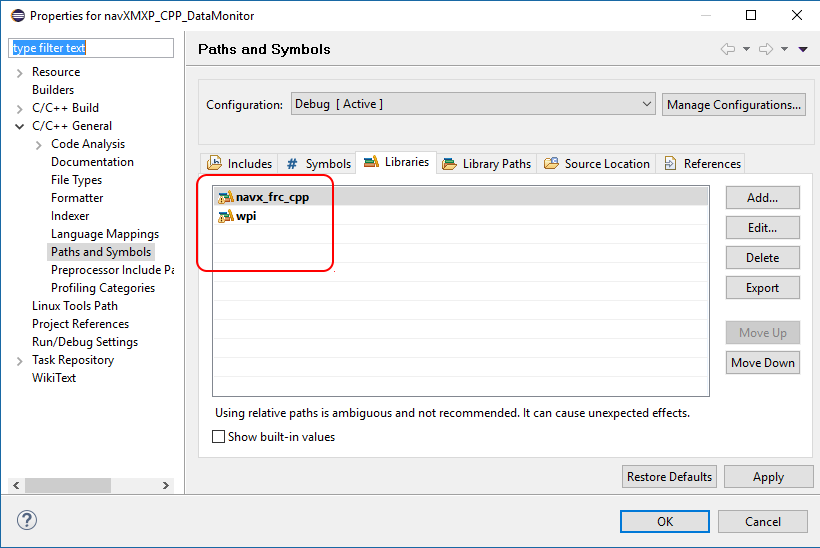
After running the setup program, the C++ libraries and include files are automatically installed to \wpilib\user\cpp.A small configuration change must be made to your Eclipse C++ Project in order that the C++ compiler can locate the navX-MXP library:
Add the navx_frc_cpp library to the list of libraries. Within the same “Tool Settings” tab select the “Cross G++ Linker -> Libraries” node in the tree on the left, and then (a) add the navx_frc_cpp library to the list of libraries in the “Libraries” list in the upper-right of the Settings window.
Important note: the navx_frc_cpp library must be listed before the wpi library.
Once the C++ library is configured as indicated above, modify the constructor of the Robot.cpp file to specify your selected interface, as follows:
ahrs = new AHRS(SerialPort::kMXP); /* Alternatives: SPI::kMXP, I2C::kMXP or SerialPort::kUSB */To better understand navX-MXP capabilities, the DataMonitor example is recommended. After compiling and downloading this example to the RoboRIO, the application will connect and sensor readings will be displayed in the DriverStation’s SmartDashboard display. This sample application’s OperatorControl() function demonstrates how to access navX-MXP sensor readings; more information is available in the online documentation for the AHRS class.
Next Steps
Once a sample application is up and running, see the Examples section for a description and sample code to implement some key capabilities enabled by navX-MXP.
Last Updated 9 years ago