Frequently Asked Questions
How does one use the LabVIEW navX-AE library?
LabVIEW navX-AE
Update [1/7/2017]: The navX-MXP LabVIEW library for FRC has been updated to support the 2017 WPI Library.
To use LabVIEW navX-AE, download the latest build of the libraries and run the included setup program, or checkout the source code with Git. To learn more about the library, online help is available.
Getting Started
Tool Palette
After running the setup program included in the latest build, the navX AE library will be located in the LabVIEW tool palette, in the WPI Robotics Library->Sensors->ThirdParty palette menu.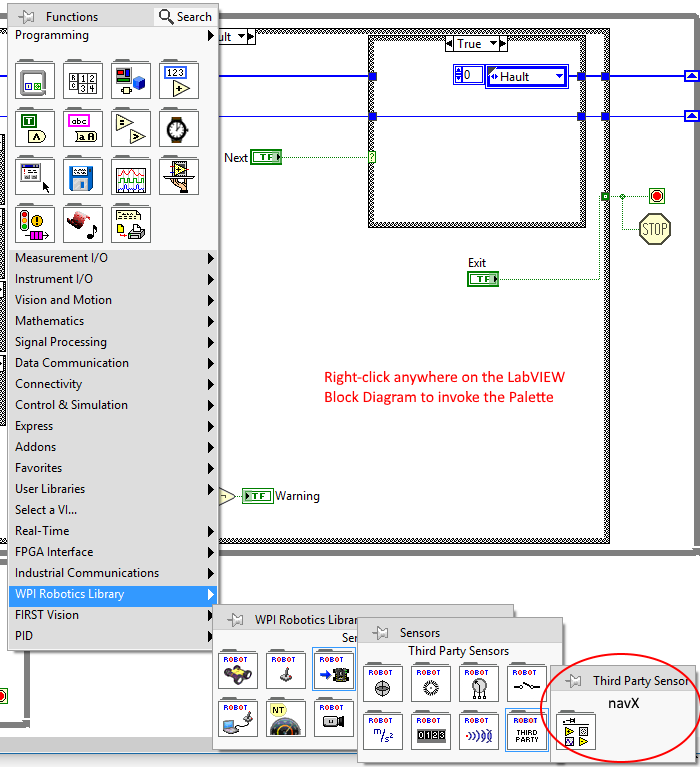 LabVIEW AE Tool Palette
navX Main.vi
To begin using LabVIEW navX-AE, locate the navX Main.vi in the navX AE Tool Palette then drag and drop the navX Main.vi onto your main block diagram (alternatively, you can place navX Main.vi in the timed tasks vi). Important NOTE: DO NOT PLACE navX Main.vi in a loop.Once placed on the block diagram, navX Main.vi will initialize communications with the navX-MXP sensor. After placing navX Main.vi on the block diagram, use the protocol selector to choose the communication protocal that you want to use. Choices include SPI, I2C, TTL UART, and USB.
Reading sensor data
After configuring navX Main.vi, sensor data can be retrieved from the connected navX-MXP. Available sensor data is accessible via the various navX-AE “Get” vis on the “Get” Tool Palette.Modifying sensor configuration
In addition to retrieving sensor data, certain actions (such as zeroing the yaw) are available via the navX AE “Set” vis on the “Set” Tool Palette.Next Steps
After getting the sample navX-MXP application running, please see the Examples section for a description and sample code which implements some key capabilities enabled by navX-MXP.Last Updated 9 years ago