Frequently Asked Questions
How does one use the advanced configuration tool?
Advanced Configuration Tool
The navXConfig Tool is used to modify certain navX-sensor settings which impact the behavior of certain navX-sensor algorithms.NOTE: The use of the navXConfig Tool is an ADVANCED feature, and should only be used when directed by KauaiLabs support. Please see the section on “Restoring Factory Defaults” for instructions on recovering the original, recommended navX-sensor configuration settings.
Installing the navXConfig Tool
- Download the latest build.
- Unpack the contents of the navx-mxp.zip file and run the setup.exe program, which will install the navXUI, as well as all necessary device drivers for communicating over USB with the navX-sensor, as well as some additional tools.
- Connect the USB cable between the navX-sensor circuit board and your Windows computer.
Running the navXConfig Tool
Starting navXConfig
From your windows start menu, first select “Kauai Labs” and then click on the navXConfig item.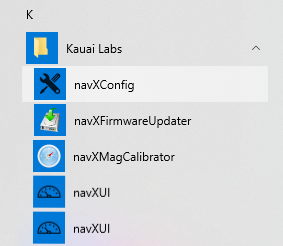
Connecting to a navX-sensor
Once the navXConfig application is started, select the COM Port on which your navX-sensor is connected, and press the “Open” button. If a navX-sensor is successfully opened, you will see identifying information about the navX-sensor circuit board: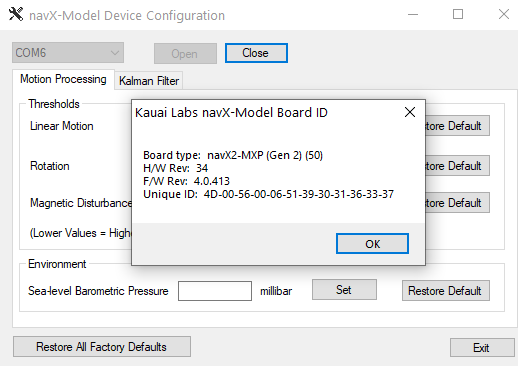
Editing Configuration Settings
The following navX-sensor configuration settings can be modified using navXConfig:
Motion Processing Settings
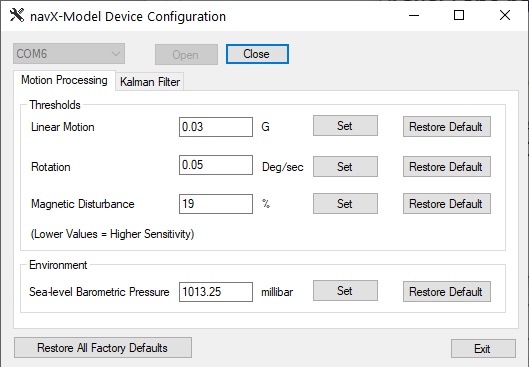
Several Motion Processing settings may be modified, as follows:Thresholds
Threshold settings define the level at which particular “events” occur.Linear Motion
The navX-sensor motion detection algorithm indicates the navX-sensor is “moving” when the sum of the X and Y axis linear acceleration values exceed this threshold. Note that this threshold can impact the Gyroscope/Accelerometer calibration process, so if this value is modified, the calibration process should be tested afterwards to confirm it still works as intended.Rotation
The navX-sensor rotation detection algorithm indicates navX-sensor is “rotating” when the angular rotation within the last second exceeds this threshold in Gs. Note that this threshold can impact the Gyroscope/Accelerometer calibration process, so if this value is modified, the calibration process should be tested afterwards to confirm it still works as intended.Magnetic Disturbance
The navX-sensor magnetic disturbance algorithm indicates navX-sensor has detected magnetic disturbance when the strength of the currently-measured magnetic field exceeds that the calibrated earth magnetic field strength by this threshold, which is a percentage. Note that this threshold can impact the 9-axis “fused” heading fusion algorithm, so if this value is modified, the 9-axis “fused” heading process should be tested afterwards to confirm it still works as intended.Environment Settings
Environment Settings are used to define attributes describing the environment in which navX-MXP is used.Sea-level Barometric Pressure (Aero-edition Only)
The Sea-level Barometric Pressure settings specifies the atmospheric pressure (in units of millibars) of sea-level in the particular location where navX-sensor is used. This value should be as accurate as possible for the current location, and will impact the calculation of altitude.Generation 2 navX-Sensor Settings
When connected to Generation 2 navX-Sensors, additional settings are available. These settings are discussed separately in the Optimizing Accuracy of a Generation 2 navX-Sensor knowledgebase article.Restoring Factory Defaults
When navX-sensor units are shipped from the factory, the configuration settings which can be modified via navXConfig are set to default values. These default values were selected because they were tested and found to provide the most accurate results.The default navX-sensor configuration settings can be restored at any time by pressing the “Restore Factory Defaults” button.
Last Updated 9 years ago